Concept:
One of the great things about AutoCAD is that it can be easily customized to suit the individual user. By now, you have seen how you can change the osnaps for example, but you can change a lot more than that. This lesson will introduce you to some of the customization options you have.
Keyboard Shortcuts (you will need to have the express tools installed)
So far you have been using AutoCAD's default shortcuts. This section will show you how you can create your own to help your productivity. All shortcuts are stored in the acad.pgp file. This file is loaded into AutoCAD every time you start the program. It is now easy to edit thanks to an express tool names ALIASEDIT.
Type in this command and you'll see a dialog box pop up. Press the Add button.
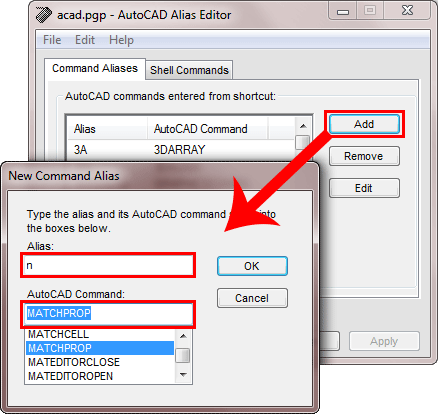
In this example, I have created a shortcut for MATCHPROP which is usually MA (I find that two keys on opposite sides of the keyboard slow me down). Since N is not used for anything, I find that one letter is more than twice as fast as two. Type in what you see and press OK.
Now press Apply so that the changes take effect. You'll see this dialog box warning you that you are about to overwrite your acad.pgp file. Press yes, ONLY if you are sure you did the correct changes.
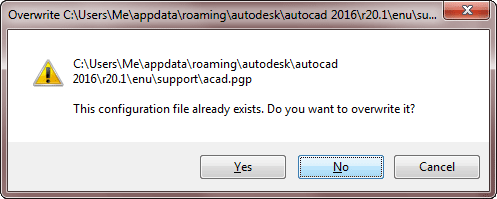
Press Yes and you will see a message pop up that you have saved your changes and that your current AutoCAD session has been updated. That means that you can now use the shortcut you just added.
CUSTOMIZING THE INTERFACE
Quick Access Toolbar
The quick access toolbar is the row of icons at the top of the screen. You'll find Save, Print and other common commands there. One that you won't find is Save as. This is a pet peeve of mine, so I added it. It's easy and you can do it to. Use this method for adding any commands to this toolbar.
Navigate the Ribbon to Management > Customization > User Interface. You'll see this dialog box come up.
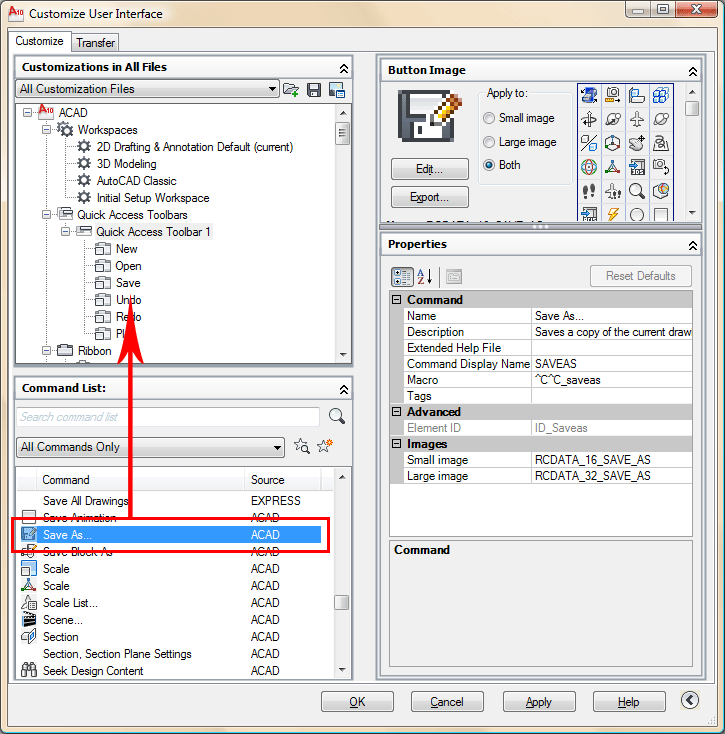
In the top left section, look for the Quick Access Toolbar 1 folder. Then look for the Save as command in the list in the bottom left. Drag the command up to it's desired position on the toolbar. Press Apply. Your toolbar should now look like this.

If you have read all the tutorials, you'll know that I don't recommend using icons. Still there are sometimes you may want to. Perhaps the command isn't used much, but you want easy access to it. Perhaps you can't create a shortcut for the command. There could be a few reasons, but here is how to create a new toolbar with the icons you want.
With the CUI dialog box open, right click on Toolbars and select New Toolbar.
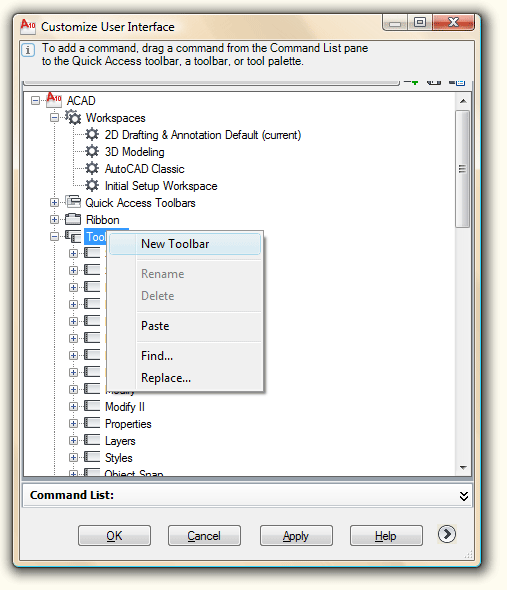
Once you have your toolbar added to the list, drag a command up to it. I've decided that I want to have a toolbar with an Update Dimensions on it to save me some typing. Once you have some commands on your toolbar, press Apply to see your new toolbar.
Now you will add icons to your new toolbar. Right-click a toolbar and select Customize again. You'll see all the commands listed. You can now drag and drop an icon from that list to your custom toolbar. For this exercise, look at the list for commands you don't recognize and add them to your toolbar so you can try them out.
Right-Click Customization
You can also control how your mouse works. By default AutoCAD displays a menu when you right click outside of a command. To do this, type OP for options and go to the user preferences tab. Select the "Right-Click Customization" button. You'll see this dialog box.
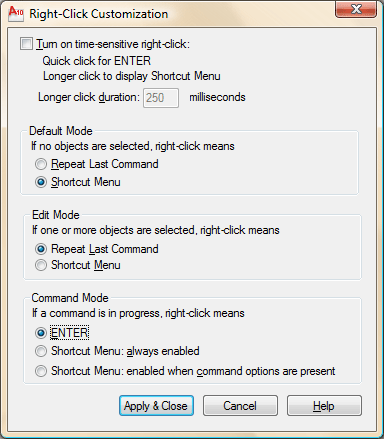
For example, you should find that using right-click as and 'enter' will speed things up. Unless you frequently use the menus, you should switch to this.
These are just a few ways that AutoCAD can be customized. You can create custom hatch patterns and linetypes - even fonts. Other options include programming to automate tedious tasks in VisualLisp, VBA or C++(ARX). As you get more familiar with AutoCAD, look into these options.


0 komentar:
Posting Komentar